Hi All,
Many apologies that the update on the flex test is so ‘overdue’ – it has been a crazy couple of months, but definitely an educational period!
Thanks to everyone who has sent words of encouragement and support for our project. I am really delighted with how it is going, and I owe so much of that to what I’ve learned on ExPo. “They” said it was impossible for a ‘privateer’ to build a competent large-scale expedition vehicle in North America, but we’ve had a blast doing it.
Of course there have been some hiccups along the way, but that’s all a part of the ‘fun’. The flex test has certainly been a part of that. And so….
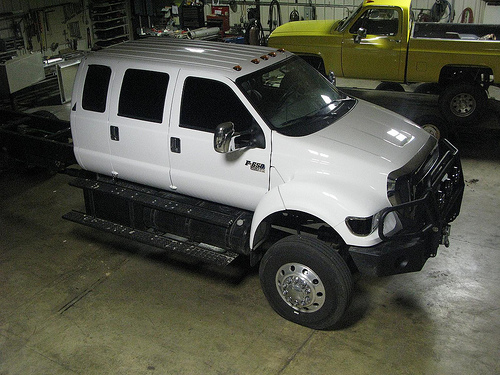
In a series of posts a long, long time ago we were debating whether or not the F-650 chassis would flex at all, especially given how much we reinforced the frame.
Just as a brief reminder, or for those not following the story — we reinforced the entire frame with very long, very heavy, Steel L-Channels:

Well, to those of you who ‘told me so’ – please feel free to post replies with “I told you so” because it certainly does flex… a lot!

Pretty scary, eh!?
As you can see, with just the floor and our double puck mounts, the whole thing got twisted out of shape.
I was pretty much ready to pack it in at that point and started re-reading old ExPo posts about diamond mounts, and three-point pivots. However, Jeff our engineer said: “Give it some structure and it will all tighten up, trust me.” And so we started experimenting.
First we added a 500lb steel fabricating table, lying upside down top of the floor.

Then the guys tack welded a simple box frame on the floor to help stiffen it up.
…and then we tested again.

Now, the deflection between opposite corners was down to just a few inches, with the mount taking a lot of the flex.
So we tested it some more…

And things started looking a little better…

Now, when you really twist the chassis, the mount actually does what it is designed to do and the two ends behave relatively independently:

Pretty darn cool actually. I really need to give a big thanks to all who gave me advice about this over the past few months on ExPo and in PM’s. But, especially to Jeff Kuhl and the guys at Austin Engineering who have done a great job bustin’ their butts to lift my truck up in the air repeatedly to see what it will do.
Based on all that, we decided to keep building, under the beliefs that:
- the additional structure will only stiffen it up more and let us test what is really going to happen on the trail.
- the ‘dynamic’ sub-frame mount has been designed to be easily removed. If it really doesn’t work, then with a forklift and a few hours we can pick the camper up off the chassis, and replace the mount with a more traditional 3-point style mount if we have to.
And so we kept building. Here’s what it looks like today:

I love that shot!  …it’s my new wallpaper and I get excited everytime I look at it.
We’re still a long way from being done, but it’s all coming together now.
We have almost ALL the parts assembled in the shop. Right down to the kitchen sink, literally.
We’ve changed the plan (discussed much earlier in this thread) and have been working with Geoff at AirHead to sort out a usable long-term land-use design for his composting toilet — but more about that in a future posting.
The plan is to have the frame fully built and the alucobond skin on the camper in time for us to bring the truck to the Upper Penninsula Expo Rally at the end of the month. Then comes the hard part – putting all the little details inside: furniture, electrical, plumbing, etc…
Damn am I excited though!
Related


 …it’s my new wallpaper and I get excited everytime I look at it.


Comments are closed here.